Tips For Fried Chicken Perfection + Kate’s Recipe
Fried chicken is a beloved dish, but many people struggle with making it at home. This step-by-step guide will teach you how to know when fried chicken is done, plus the secrets to perfectly crispy, yet tender fried chicken every time with my super easy recipe.
We’ve all had it – that tense moment when you think your fried chicken might be done, but a nagging voice whispers, “Is it really ready?” Visions of undercooked poultry or burnt, dry hunks of meat dance in your mind.
Fear no more, fellow foodie! Let’s unpack foolproof ways to know when your fried chicken achieves that golden, juicy perfection that you can serve with Jamaican curried cabbage, sweet potatoes, or even brown rice.
How To Know When Fried Chicken Is Done Without A Thermometer
While a meat thermometer is handy, there’s more to mastering fried chicken. Here’s what my multiple tests of this recipe have taught me:
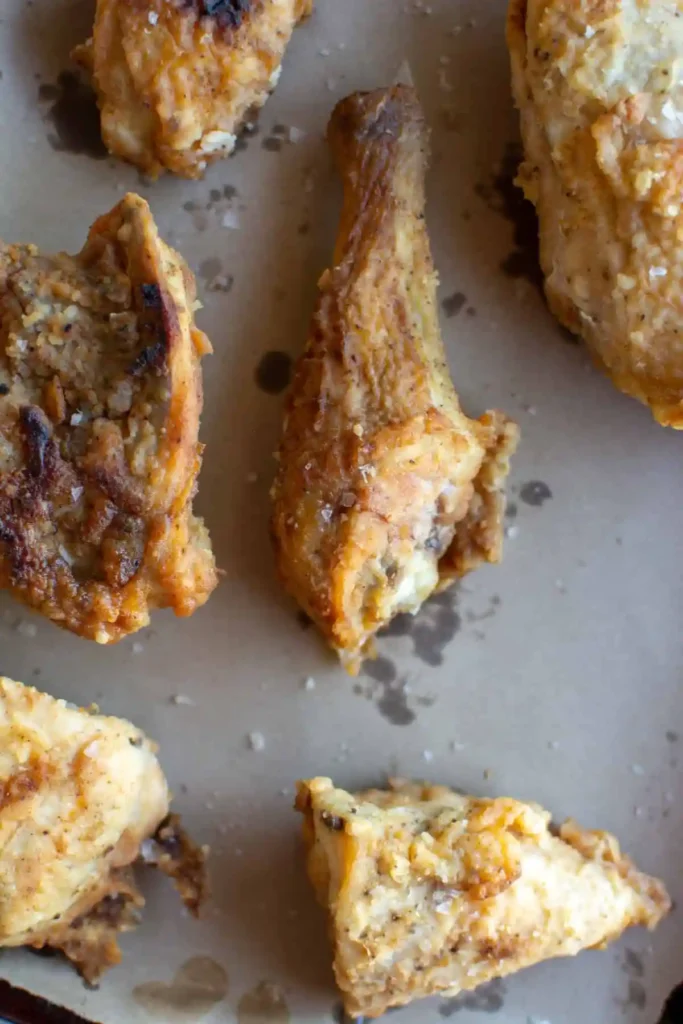
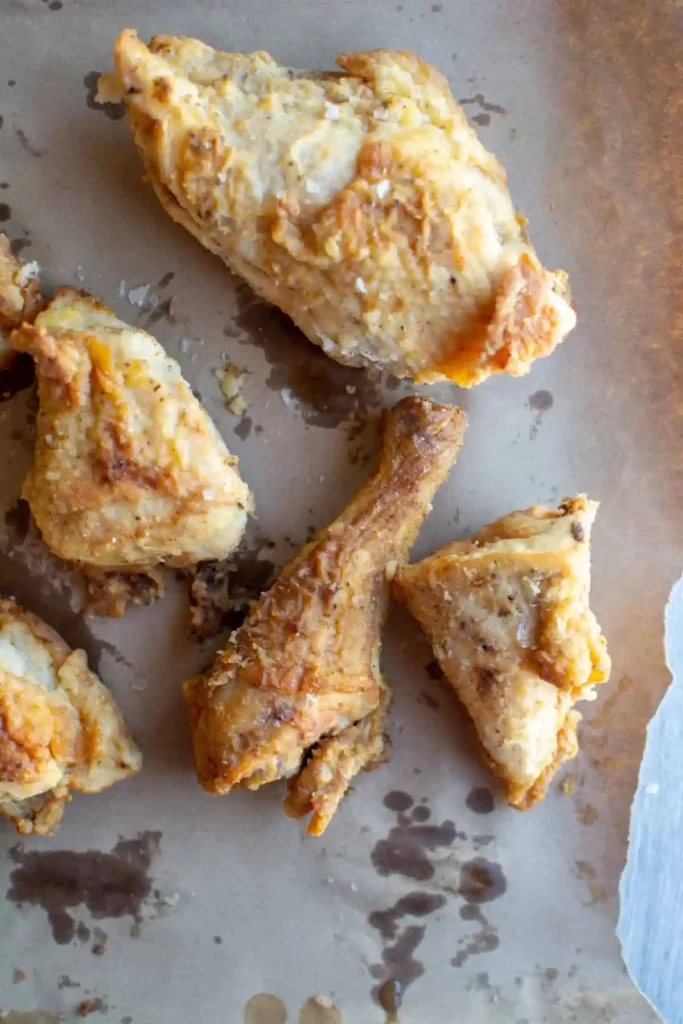
- The Golden Glow: Your chicken should be a deep, rich golden brown. Too pale means more cooking time needed; a dark, burnt crust signals overdoneness.
- The Sizzling Symphony: That gentle sizzle in the pan? That’s your “chicken is almost ready” song. Once the sizzle quiets, it’s usually a sign to pull the chicken from the oil.
- Test the Texture: Gently prod a piece of chicken. If it feels remarkably firm, you’ve likely got a winner. If it’s still soft and squishy, it needs more time in the fryer.
- The Bubble Factor (Advanced technique): Observe the bubbles around your frying chicken. If they’re large and slow, your oil temperature might be too low. Conversely, tiny, rapid bubbles might indicate your chicken is on the fast track to being overcooked.
Helping You Find Your Kitchen Mojo
Learning these visual cues is about more than just delicious fried chicken; it’s about unlocking that fearless home cook within you.
As someone who’s experimented with countless fried chicken recipes over the years, I know how empowering it feels to nail a kitchen skill.
By providing trusty recipes like my cornbread with cheddar and rosemary or my best-ever cocoa cookies, and teaching you how to read the signs your food gives you, I want to make the kitchen your happy place.
So, are you ready to ditch the doubts and become a fried chicken master?
Keep reading for one of the easiest and best fried chicken recipes! It is the best way to master those fried chicken skills before you move on to something more complicated.
Ingredients
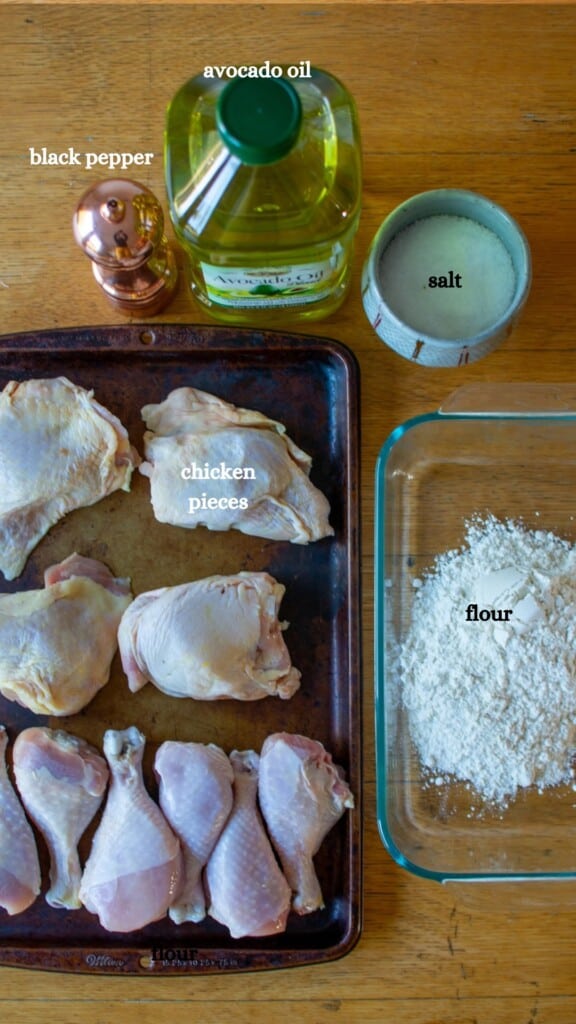
- Bone-in skin-on chicken thighs and drumsticks. If you prefer white meat you can also use bone-in, skin-on chicken breasts cut in half. You can also cut up a whole chicken into 10 pieces.
- Avocado oil, peanut oil, canola oil, vegetable oil or any oil with a high smoke point (one that can withstand a high temperature without burning), for frying. Most southern cooks also add bacon grease or Crisco to the oil for improved flavor and texture.
- All purpose flour for that crispy crust.
- Kosher salt. To keep things simple I just use salt and pepper for seasoning the chicken. Feel free to add garlic powder, cayenne, paprika, or your favorite spice.
- Black pepper offers a well-rounded flavor.
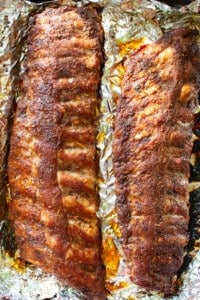
✨ After making this recipe, you should try my Vinegar and Spice Baked Baby Back Ribs! ✨
Equipment
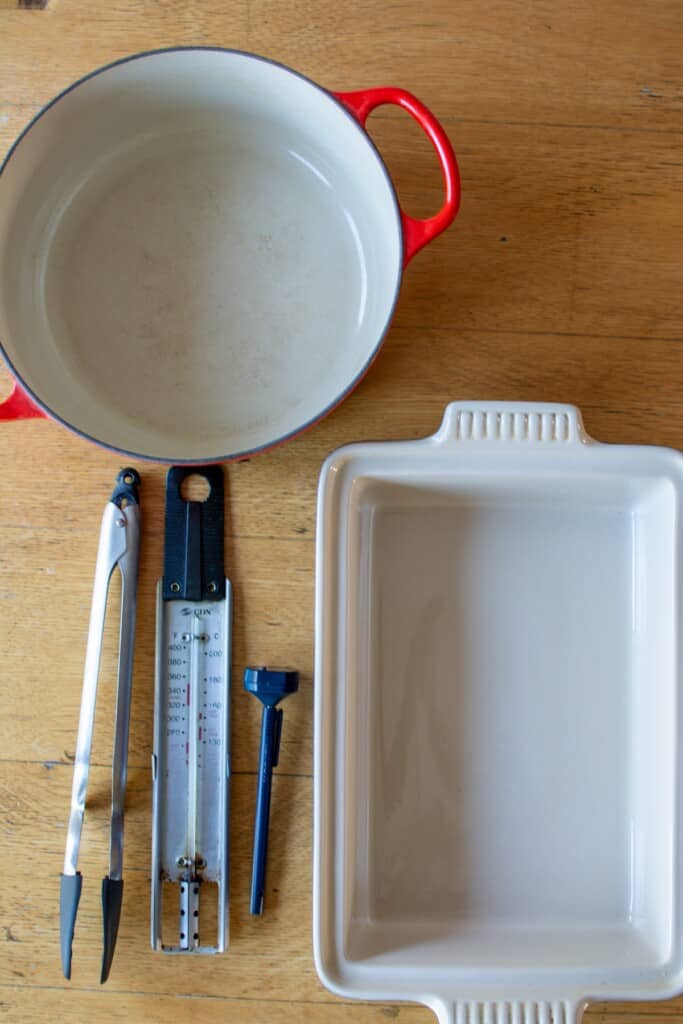
You don’t need a deep fryer to get extra-crispy fried chicken. You can make it with these 4 things:
- Shallow baking dish. For dipping the chicken pieces.
- Cast iron skillet. Lodge makes a deep pan called a chicken fryer that is obviously ideal for frying chicken. A large Dutch oven also works (that’s what I use).
- Deep frying thermometer. It is important to keep the oil at the right temperature (350°F). An inexpensive deep-fry thermometer will tell you when it is too hot or too cold.
- Digital thermometer. An instant-read thermometer inserted in the thickest part of the chicken is the best indicator of doneness.
How To Make This Recipe
step one
Season. Season the dark meat chicken pieces with salt and pepper. Line a baking sheet with paper towels and place a wire rack on top. Let chicken sit out at room temperature while you wait for the oil to heat up.

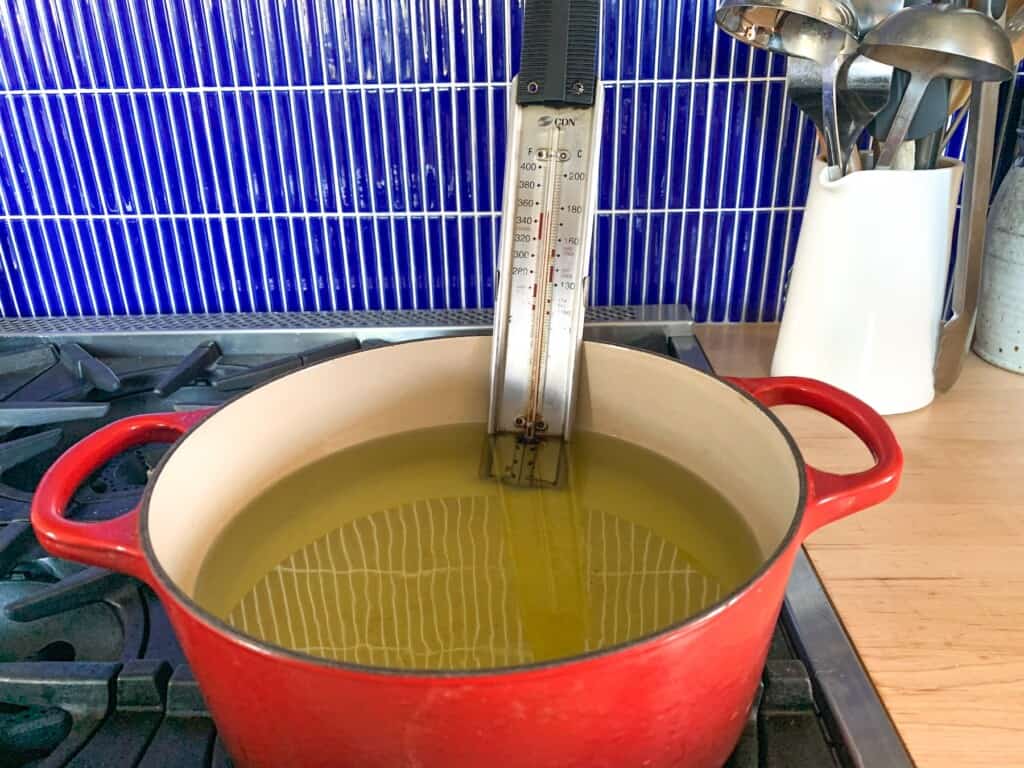
step two
Heat oil. Place a deep cast iron chicken fryer or other large Dutch oven over medium heat. Pour in enough oil so there is at least 2 inches of oil in the pan (I used 2 liters, about 8 cups, of oil). Heat until the temperature of the oil reaches 350°F or until a piece of bread browns immediately when dropped in the oil. This usually takes between 10-15 minutes to reach temperature.
step three
Season flour. While oil is heating, place flour in a shallow dish and season generously with salt and pepper; stir to combine. Heat oven to 250°F.

step four
Coat chicken. Once oil is hot, dredge a few pieces of chicken in the flour mixture, making sure to get into all the nooks and crannies.

step five
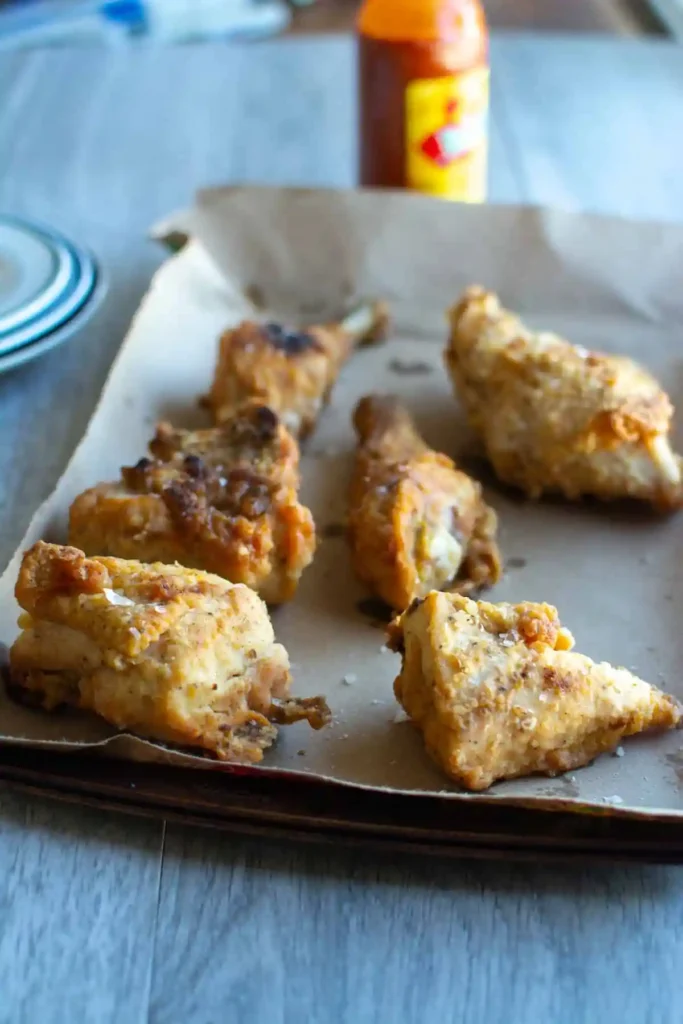
Fry chicken. Fry in batches, 3 to 4 pieces at a time, until crispy, brown, and juices run clear, about 12-15 minutes. Insert an instant read thermometer in the thickest part of the meat. When the internal temperature of the chicken reaches between 170°F- 175°F, it is ready.
Place on the wire rack to drain and transfer to the warm oven. Continue with remaining chicken.

step five
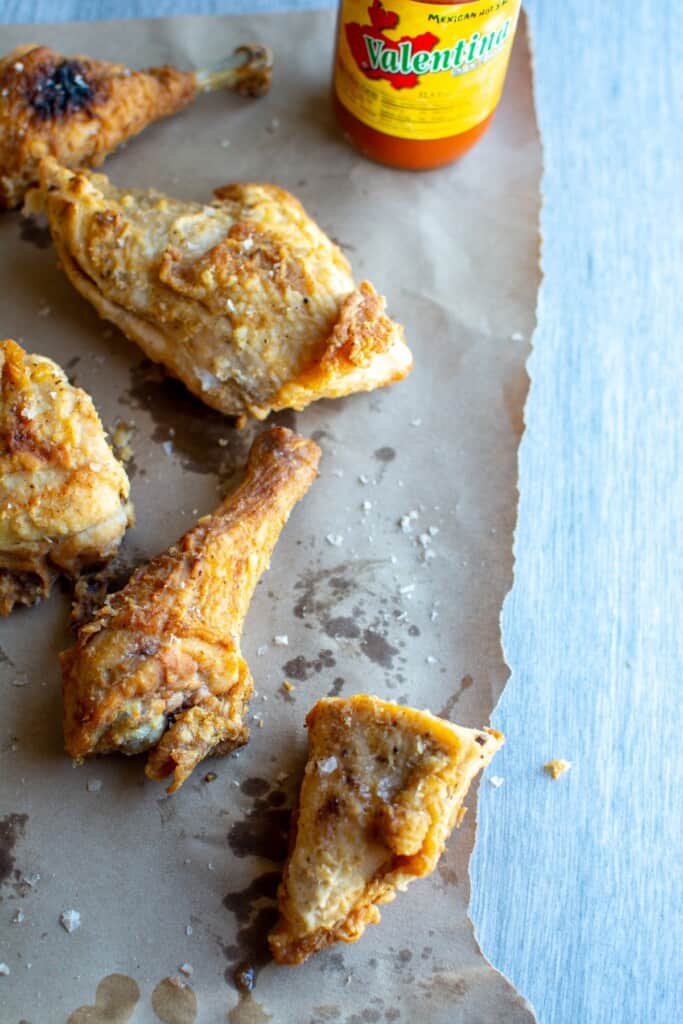
Serve! For best results let the meat cool 10 minutes before serving otherwise the inside will be scalding hot. Serve with hot sauce

Why Is There No Brine?
The goal of this recipe is to make it as simple as possible. If you’d like to add overnight brining to your chicken, soak the pieces in an acidic liquid like buttermilk or pickle brine.
You could even use the brine from a can of pickled jalapeños like I did for this Pickled Jalapeño Fried Chicken I created for Better Homes & Gardens.
What To Serve With Your Fried Chicken
Potato salad and macaroni and cheese are southern staples for fried chicken but I like to serve it with something fresh like my kale salad with wild rice or my super easy tomato avocado and cucumber salad.
For dessert why not try my friend Alison’s gluten-free carrot cake or my friend Becky’s Chocolate Mint Cake. Need cocktail ideas? Try Alison’s lemon-lavender gin spritz!
Top 5 Most Popular Chicken Recipes
- Satay Chicken Skewers with Curry Peanut Dipping Sauce
- Kate’s Best Chicken Cacciatore Dutch Oven Recipe
- Creamy Chicken Noodle Casserole
- Healthier Dairy-Free Chicken Pot Pie
- 30-Minute Chinese Imperial Chicken with Garlic Rice
Is This A Great Recipe Or What?
So simple yet so delicious! Plus you’ve learned how to know when fried chicken is done. When you try it, let me know how it went! Share a photo and tag me on Instagram using @katesbestrecipes so that I can see (don’t forget to leave a ⭐️⭐️⭐️⭐️⭐️ rating)! Also, sign up for my weekly recipe newsletter so you never miss a thing.

THE EASIEST FRIED CHICKEN RECIPE
Ingredients
- 3-4 pounds bone-in, skin-on chicken thighs and drumsticks or bone-in, skin-on breasts, cut in half
- 4 teaspoons Kosher salt, divided
- 1 1/2 teaspoons freshly ground black pepper, divided
- 2 liters Avocado oil, about 8 cups
- 1 cup all-purpose flour
Instructions
- Place chicken pieces on a baking sheet. Sprinkle on both sides with the 1 tablespoon of salt and 1 teaspoon black pepper. Let sit at room temperature while you heat the oil.
- Attach a deep fry thermometer to the side of a deep cast iron pot or Dutch oven. Pour in enough oil so it reaches 2-inches up the side of the pot (I used 2 liters of oil but this will depend on the size of your pot). Heat oil over medium-high heat to 350°F or until a piece of bread browns immediately when dropped in the oil. This usually takes between 10-15 minutes to reach temperature. Once it reaches temperature continue turning heat up or down to maintain 350°F.
- While oil is heating, place flour in a shallow dish and season with remaining 1 teaspoon salt and 1/2 teaspoon black pepper; stir to combine. Heat oven to 250°F, cover a baking sheet with paper towels and set a wire rack on top.
- Once oil is hot, coat a few pieces of chicken in flour, massaging it into the nooks and crannies. Fry 3 to 4 pieces at a time, flipping occasionally, until crispy, brown, juices run clear, and an instant read thermometer stuck in the thickest part of the chicken reads 170°-175°F about 12-15 minutes. Place on the wire rack and transfer to the warm oven. Continue with remaining chicken.
- Let final pieces of chicken rest 10 minutes before serving. Then serve with hot sauce.
Notes
- Oil: Don’t fill your pot too full with oil. Leave about 3-4 inches open at the top of the pot to give the oil room to bubble up without boiling over.
- Deep-frying safety: Keep a box of baking soda close to the stove when frying for putting out grease fires. Never use water.
- Oil temperature: If your chicken is browning too quickly, your oil is likely too hot. Reduce the heat slightly and watch the deep fry thermometer. Oil should stay at 350°F.
- Gluten-free: For a gluten-free option, substitute all-purpose flour with a gluten-free flour blend.
In support of this small business, Kate’s Best Recipes earns revenue in a few different ways. Several sponsored posts are published each month. I also earn an affiliate commission on the sales of products I link to— there are a few of those links in this post. I only feature items I genuinely love and personally use on a regular basis. This commission is an arrangement between the retailer and Kate’s Best Recipes (readers never pay more for products). This income allows me to run the site. Thank you for reading!