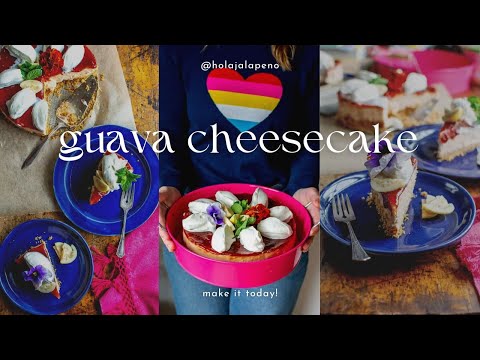
Look no further—this is only guava cheesecake recipe you’ll make again. Savor every bite of the creamiest cheesecake flavored with guava jelly baked in a crumbly Maria cookie crust with a sweet layer of guava on top.

In the midst of guava season here in Southern California and South Florida, where the trees are generously shedding their fruity gems, I present to you a guava cheesecake recipe that will leave you craving for more.
While this recipe doesn’t feature fresh guavas, fear not! The secret lies in the luscious guava jelly that infuses every bite of this creamy cheesecake, nestled in a crumbly Maria cookie crust, with a heavenly layer of guava on top.
I must admit, I’ve attempted a number of times to create a fresh guava cheesecake worth savoring, but it didn’t quite hit the mark. So, instead, I’ve embraced the convenience of guava jelly. But for those adventurous souls swarmed with an abundance of fresh guavas, feel free to embark on the journey of making your own jelly and crafting this tantalizing cheesecake from scratch. The choice is yours!
Keep in mind, the total time to make this cheesecake includes an overnight stay in the refrigerator, so plan accordingly.
What Are Guavas?

Guava fruit is a tropical fruit that grows in the Southern US, Mexico, and Central America. Guavas are small to medium-sized fruits that vary in shape, but typically have a round or oval shape.
They have a greenish-yellow skin when ripe, with a firm and slightly grainy texture. The flesh of guavas ranges in color from white to pink or red, and is filled with small edible seeds. When sliced open, guavas have a fragrant aroma and a sweet-tart taste.
You can find fresh guava as well as guava jelly and guava paste at your local Latin grocery store.
What Are Maria Cookies?
Maria cookies are a type of sweet biscuit cookie that originated in Spain and are super popular all over Mexico, Central and South America. They have a slightly sweet vanilla flavor and crisp texture. In this guava cheesecake recipe, they are used to make the crumbly crust. You can substitute graham crackers if you can’t find them.
Why You Should Try This Guava Cheesecake Recipe

- Relatively low prep time compared to other cheesecake recipes.
- A deliciously unique twist on a classic dessert.
- The gorgeous ruby red top make it an impressive cake for the holidays or any occasion.
- Ultra-creamy and luscious texture with a perfectly crumbly crust.
Ingredients

- Maria Cookies or graham crackers
- Unsalted butter
- Granulated sugar. You’ll love that most of the sweetness in this cheesecake comes from the guava jelly so we don’t need too much extra sugar.
- Cream cheese. Make sure to use full-fat cream cheese that comes in a brick. Not the whipped cream cheese that comes in a tub.
- Guava jelly, guava jam or guava marmalade. I use 1 whole 17-ounce jar.
- Lemon juice or lime juice to add some tang and balance out the sweetness.
- Vanilla extract to add some darker undertones.
- Sour cream
- Kosher salt
- Large eggs a must for any baked cheesecake. They help it set up and create that irresistible texture.
How To Make This Recipe (Step-by-Step Instructions With Photos)
step one
Make the crust. Pulse the cookies in a food processor until they are in fine crumbs. If you don’t have a food processor place the cookies in a bag and smash them with a rolling pin. Pour Maria cookie crumbs (or graham cracker crumbs if that’s what you’re using) into a medium bowl and combine with sugar and the 5 tbsp melted butter.

step two
Press into pan. Transfer crust mixture to a 9-inch springform pan and firmly press into an even layer.

step three
Bake the crust. Place crust in a 350°F oven and bake for 10 minutes. Remove and to a wire rack while you make the filling. This is an awesome crust for my Pumpkin Chipotle Cheesecake and my Dulce de Leche Cheesecake Bars as well.
step four
Beat cream cheese. Combine cream cheese and sugar in a large bowl if using an handheld electric mixer or in the bowl of a stand mixer fitted with the paddle attachment. Start the mixer on low speed, then increase the speed to medium-high and beat until fluffy, about 3 minutes. Scrape down the sides of the bowl.

step five
Add the flavorings. Beat in the guava jelly, lemon juice, sour cream, salt, and vanilla to the cheesecake filling until completely incorporated.

step six
Beat in the eggs. Add the eggs one at a time with the mixer on medium speed. Stop the mixer as soon as the last one is mixed in. Don’t over mix.

step seven
Prep the cheesecake for baking. Pour the cheesecake batter into the cheesecake crust and smooth the top. Firmly tap the cheesecake a couple of times on the counter to knock out any air bubbles. Wrap the bottom of the pan with foil. Set the cheesecake in a roasting pan.

step eight
Make the water bath. Fill a tea kettle with water and bring to a boil. Pour the water so it reaches 1 inch up the side of the roasting pan.

step nine
Bake guava cheesecake. Carefully transfer pan to the bottom third of the oven and bake for 55-75 minutes or until the edges of the cheesecake are set but the middle is still wobbly.
step ten
Let cool. Crack the door of the oven open, turn off the oven and let the cheesecake begin to cool slowly in the oven for an hour. Remove from the oven and remove the cheesecake from the water bath. Set the cheesecake on a wire rack and let cool to room temperature.

step eleven
Top with guava jelly. Warm the remaining 3/4 cup of jelly over the stove until it is spreadable but not hot. Without removing the sides of the springform pan, spread the remaining guava jelly evenly on top of the cheesecake so it reaches the edges.

step twelve
Chill overnight. Chill in the refrigerator until the jelly is firm to the touch then place a piece of plastic wrap and cover the cheesecake and continue to chill at least 4 hours, but best overnight.
step thirteen
Serve. Run a knife around the edge of the pan and remove the sides. If you’d like, top the cheesecake with whip cream, fresh mint leaves, edible flowers, and slices of fresh guava. Slice and serve.

Tips For Success
- Make sure all the ingredients are at room temperature. This ensures a smooth, not chunky cheesecake batter.
- Bake in a water bath to prevent sinking or cracking.
- Cool slowly, first in the oven with the door cracked open, then on the counter, and finally overnight in the refrigerator.
- To get clean cuts, rinse the knife and wipe it clean in between each slice.
Guava Cheesecake Recipe FAQ’s

Can I use guava paste? No guava paste is too thick and will not spread. Guava puree won’t work either. It has the opposite problem of being too thin. Have extra jam leftover? Try my Guava Cream Pie Popsicles.
Can I freeze it? Yes! for best results, I recommend freezing without the guava jelly topping and just top the cheesecake before serving. Wrap the cheesecake with a few layers of plastic wrap, then a final layer of aluminum foil. Freeze the cheesecake for up to 3 months. Thaw overnight in the refrigerator before serving.
Top 5 Most Popular Holiday Dessert Recipes
- Strawberry Tamales with Horchata Sauce
- Chocoflan {Impossible Cake}
- Authentic Tres Leches Cake
- Strawberry Tres Leches Cake
- Coconut Tres Leches Cake
Have Your Taste Buds Been Tantalized?
Give this cake a try. Let me know when you make it by snapping a pic and tagging me on Instagram @holajalapeno and #holajalapeno so I can see or leave me a comment below (don’t forget to leave a ⭐️⭐️⭐️⭐️⭐️ rating) ! Also, sign up for my weekly newsletter, lots of good stuff there too!

Guava Cheesecake Recipe
Look no further—this is only guava cheesecake recipe you'll make again. Savor every bite of the creamiest cheesecake flavored with guava jelly baked in a crumbly Maria cookie crust with a sweet layer of guava on top.
Ingredients
Maria Cookies Crust
- 1 sleeve (36 cookies) Maria cookies
- 5 tablespoons unsalted butter, melted
- 1/4 cup granulated sugar
Cheesecake
- 32 ounces (4 (8-ounce) bricks) full-fat brick cream cheese, room temperature
- 3/4 cups granulated sugar
- 3/4 cup guava jelly
- 1/3 cup sour cream
- 2 tablespoons lemon juice, from 1 large lemon
- 1 teaspoon vanilla extract
- 1/4 teaspoon kosher salt
- 3 large eggs, room temperature
For the Topping
- 3/4 cup guava jelly
- Whipped cream (optional)
- Edible flowers (optional)
- Fresh mint leaves (optional)
- Fresh guava, quartered
Instructions
- Preheat oven. Heat oven to 350°F and arrange rack in the lower third of the oven.
- Make crust. Use a food processor to grind the Maria cookies into fine crumbs. You will need 1 1/2 cups of ground cookies. Pour them into a medium bowl and stir in sugar until combined, and then stir in the melted butter. Mixture will be sandy.
- Bake crust. Press firmly into the bottom and slightly up the sides of an ungreased 9-inch springform pan. Pat down the mixture into an even thickness. Bake for 10 minutes. Remove from the oven and place on a wire rack to cool.
- Beat sugar and cream cheese. Combine the cream cheese and sugar in the bowl of a stand mixer fitted with the paddle attachment. Beat on medium-high speed until the mixture is smooth and creamy, about 2 minutes.
- Add flavorings. Scrape down the sides of the bowl with a rubber spatula. Add the guava jelly, lemon juice, sour cream, vanilla extract, and salt, then beat on medium-high speed until fully combined.
- Beat in eggs. Scrape down the bowl again then add the eggs one at a time, beating after each addition until just blended. Don't overmix or the cheesecake will crack as it cools.
- Prep for baking. Scrape cheesecake batter into crust and smooth the top. Give it a couple of raps on the counter to knock out any air bubbles. Wrap the bottom of the pan with foil and set inside a roasting pan.
- Make water bath. Bring a tea kettle full of water to a boil. Pour the hot water into the roasting pan to create a water bath. Keep pouring until it reaches an inch up the side of the pan. Transfer to the oven. If it is easier for you to place the pan in the oven first, then fill with hot water do that instead.
- Bake cheesecake. Bake cheesecake for 55-70 minutes or until it is set around the edges but still a little wobbly in the middle. Check occasionally and fill up the water bath with more hot water if the pan looks dry. Tent the cheesecake with foil if it is starting to get too dark on top. Turn off the oven, crack the oven door open and let the cheesecake cool slowly in the oven for an hour.
- Let cool to room temp. Remove from the water bath and place on a wire rack to cool to room temperature.
- Spread with jelly. Heat jelly in a small saucepan until it is just spreadable but not hot. Stir continuoulsy breaking up any lumps. Without removing the sides of the pan, spread the guava jelly evenly over the top of the cheesecake to the edge with out going over.
- Chill. Place cake in the fridge, uncovered for about hour or until the jelly is firm. Cover with plastic wrap and return to the fridge for at least 4 hours, but preferably overnight.
- Serve. Run a knife around the edge of the pan and remove the sides. Top with whipped cream, edible flowers, fresh mint leaves, and slices of fresh guava if you'd like. Slice and serve! To make clean slices wipe the knife clean between every slice. Enjoy!
Notes
- Guava jelly: I used 1 entire 17-ounce jar. Half goes into the cheesecake batter and 1/2 goes on top.
- Room temperature: Remember to bring all the ingredients to room temperature before starting the recipe for best results.
- Chilling: Don't skip the overnight chilling step in the refrigerator as it helps the cheesecake set properly and develop its creamy texture.Remember to bring all the ingredients to room temperature before starting the recipe for best results.
- To finish: For a decorative touch, top the cheesecake with whipped cream and slices of fresh guava, mint leaves, and edible flowers before serving.
Recommended Products
As an Amazon Associate and member of other affiliate programs, I earn from qualifying purchases.
Nutrition Information:
Yield: 16 Serving Size: 1Amount Per Serving: Calories: 46Total Fat: 0gSaturated Fat: 0gTrans Fat: 0gUnsaturated Fat: 0gCholesterol: 0mgSodium: 1mgCarbohydrates: 12gFiber: 0gSugar: 11gProtein: 0g
In support of this small business, ¡Hola! Jalapeño earns revenue in a few different ways. Several sponsored posts are published each month. I also earn an affiliate commission on the sales of products I link to— there are a few of those links in this post. I only feature items I genuinely love and personally use on a regular basis. This commission is an arrangement between the retailer and ¡Hola! Jalapeño (readers never pay more for products). This income allows me to run the site. Thank you for reading!


leave a reply