
Our favorite flour tortilla recipe based on the method from Mexico: The Cookbook. A wet dough and long kneading time make them soft and chewy.
Recipe first posted February 15, 2015. Last updated with clearer instructions on January 10, 2024

I have been pouring over Mexico: The Cookbook, have you guys read it? There are so many things I want to try. So many things I’ve never heard of. I think I could live the rest of my life and never know even a quarter of what makes up Mexican cuisine.
Could someone please tell me what acitrón de biznaga is? And further more, where I can buy some? This book is giving me a serious case of wanderlust, I just want to know more and more and more.
I have a loooooonnnnggg list of the recipes I want to try from the book but a true indication of any cookbook’s integrity is most often found in the most basic of recipes, therefore, flour tortillas is where I began.
We are a big flour tortilleros in our family.
Armando’s family is from Chihuahua in Northern Mexico where flour tortillas reign supreme so he generally prefers flour to corn.
I’ll admit since discovering pre-rolled, but not cooked, flour tortillas at the grocery store, I hardly ever make my own, but they really are not in the least bit difficult to make and as you can imagine, homemade tortillas are pretty outstanding.

Ingredients To Make This Flour Tortilla Recipe

Home cooks who make flour tortillas for the first time are always surprised at how short the ingredients list is. Are you ready? Here are the simple ingredients:
- All purpose flour
- Vegetable shortening, butter, or lard
- Kosher salt
- Baking powder
- Water
How To Make This Flour Tortilla Recipe
If this is your first time making tortillas I suggest following the instructions on the recipe card which tell you how to mix the dough with a stand mixer. This is a very sticky dough (which is the secret to stretchy, chewy tortillas) and might be challenging to make by hand for first-timers.
step one
Combine dry ingredients. Measure the flour by the scoop and scrape method and add to a large bowl. Mix in the baking powder and salt.

step two
Add shortening. Add whichever fat you are using (if using butter make sure it is at room temperature) and rub it into the flour with your hands. Keep working it in until the flour resembles coarse sand with a few larger pebble-sized pieces of fat here and there.

step three
Add water. Add water (warm water from the tap is fine) and stir it in with your hands until all the flour is wet and you have a sticky dough.
step four
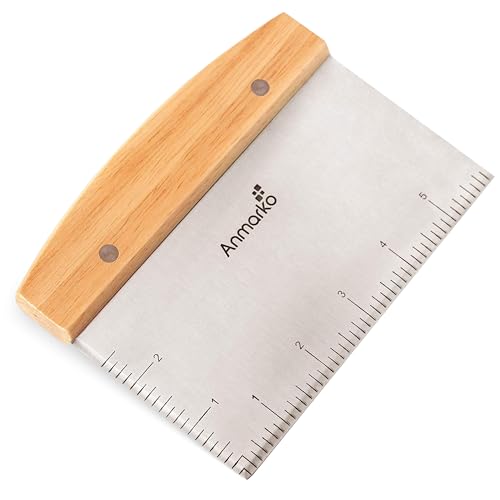
Knead the dough. Scrape dough onto a clean counter (don’t add extra flour) and begin kneading the dough. It will be very sticky at first but will come together as you knead it. Use a bench scraper if you have one to unstick the dough from the counter as you go. Knead the dough for 5 minutes. The picture below is what the dough will look like after 5 minutes.

step five
Let it rest. Oil a large bowl and place the dough inside of it. Cover with a piece of plastic wrap and let the dough rest for 20 minutes.

step six
Divide the dough. Pinch off one piece of the dough and roll into a ball. The size will depend on how big your comal or skillet you are going to cook the tortillas on is. If you have a smaller pan you don’t want the dough balls to be too big.
My griddle is 10 inches, so I make my balls about little bit larger than a golf ball each weighing around 1 1/2 ounces (using a kitchen scale makes this super easy). This size ball makes about 8-inch tortillas.
Roll to make smooth balls then place on a parchment-lined baking sheet. I usually get between 28-30 balls. Cover with a clean kitchen towel.

step seven
Roll the dough. Place one ball of dough on a floured work surface and roll with a rolling pin into a very thin circle. Keep dusting the counter and rolling pin to maintain a lightly floured surface to prevent from sticking while you are rolling the tortillas. You should be able to see through the dough. That’s how thin it needs to be. Repeat with the remaining dough balls.
You can roll all the dough balls at once and keep them separated between pieces of parchment paper or do them one at a time.

step eight
Cook the tortillas. Heat a comal or cast-iron skillet over medium heat. Let heat for about 3 minutes before adding your first tortilla.
Place tortilla on the hot pan and let cook, undisturbed, for about 1 minute or until the surface is covered with bubbles, it removes easily from the pan and has some golden brown spots. Flip and cook on the other side a minute more.

step nine
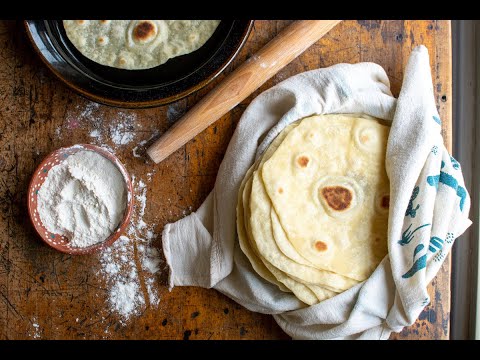
Enjoy! Keep tortillas warm wrapped in a clean kitchen towel and serve right away or let cool completely and then store in a plastic bag or airtight container for up to a week in the refrigerator. Rewarm in a skillet over medium-high heat for a minute or two before eating.

These Flour Tortillas Were Made For:

- Roasted Squash and Kale Quesadillas (healthy, cheesy, YUM!)
- Fried Green Tomato Vegetarian Burrito (make extra-large tortillas for this one)
- Shredded Beef Tacos (our favorite pairing)
- Classic Grilled Steak Fajitas (naturally)
- Rainbow Veggie Quesadillas (lots of veggies!!)
- Green Tomato Chili (the flour tortilla makes and excellent dipper)
Variations On This Flour Tortilla Recipe

How to make them gluten-free. I’ve never tried this recipe with gluten-free flour (if you have please let me know how it went in the comment section below). If you are gluten-intolerant however, I encourage you to make these corn tortillas. They are the bomb!
How to make them with a stand mixer. Combine the dry ingredients in the bowl of a stand mixer fitted with the dough hook attachment. Add the shortening and water and mix on low just until the dough comes together, then raise the speed to medium and knead for 5 minutes. Continue with the recipe as written.
How to make them with other fats. You can swap the vegetable shortening for equal amounts of lard or butter or a combination of any of these as long as it equals 2/3 cup. I’ve never made them using a liquid fat like vegetable oil or olive oil but if you wanted to give it a try, please let me know how they turned out.
How to make them with a tortilla press. You can’t. The dough is too springy and won’t get flat enough. It doesn’t work.
More Authentic Mexican Recipes You’ll Love
- Got a can of chipotle peppers in the fridge? Here’s 17 recipes to use them.
- Have you ever made Agua de Jamaica at home? Give this recipe a try!
- This Cilantro Cream Sauce is good on everything!!
- Chicken Mole Verde is one of our go-to meals for family gatherings.
- Kid-friendly option: Chicken Flautas Mexicanas
- A Mangonada is refreshment in the palm of your hand
- Every home cook needs a good bean recipe in their back pocket. This is mine.
Homemade Flour Tortillas Are Simply Dreamy
This flour tortillas recipe is so YUMMY with the perfect soft, chewy texture. You’ll never buy store-bought tortillas again! Try them and let me know how it goes by snapping a pic and tagging me on Instagram @holajalapeno and #holajalapeno so I can see or leave me a comment below (don’t forget to leave a ⭐️⭐️⭐️⭐️⭐️ rating) ! Also, make sure to sign up for my weekly newsletter, lots of good stuff there too!

Homemade Flour Tortilla Recipe
Recipe adapted from Mexico: The Cookbook.
Our favorite flour tortilla recipe based on the method from Mexico: The Cookbook. A wet dough and long kneading time make them soft and chewy.
Ingredients
- 4 cups all purpose flour measured with the scoop and scrape method
- 2 teaspoons kosher salt
- 2 teaspoons baking powder
- 2/3 cup vegetable shortening, lard, or room temperature butter
- 1 3/4 cup hot water (hot from the tap is fine)
Instructions
- Mix dry ingredients. Measure the flour using the scoop and scrape method and add it to a large bowl. Add the baking powder and salt and mix to combine.
- Add vegetable shortening (or whatever fat you are using) and rub into the dry ingredients with your fingers until it looks like sand with some small pea-sized pieces.
- Add the hot water and mix with your hands until the dough is evenly moist. It will be very sticky.
- Lightly flour a clean surface and turn the dough out onto the counter. Sprinkle with flour and knead, folding the dough over itself and pushing it out with your palm, sprinkling with more flour when it gets sticky. Use a bench scraper to scrape the dough off the counter, sprinkle the counter with flour and knead some more. Do this for 5 minutes or until a soft, springy dough forms.
- Let rest. Grease a large bowl place the dough inside and turn to coat in the oil. Cover with plastic wrap and let rest 20 minutes.
- Divide the dough. Pinch off a small piece of dough (a digital scale is really handy for this). The size of the piece will depend on how large your comal or skillet you will be cooking the tortillas on is. Mine comal is 10-inches so I make about 1 1/2 ounce-sized balls (a little bigger than a golf ball) which give me 8-inch tortillas. Roll into smooth balls and place on a parchment-lined baking sheet. Cover with a clean kitchen cloth. Let balls rest another 20 minutes.
- Heat the pan. Place a comal or other nonstick skillet over medium heat and let warm at least 3 minutes before you cook any tortillas on it.
- Roll the tortillas. Place a ball of dough on a lightly floured counter and flour a rolling pin. Roll each ball into a very thin circle. You should be able to see your hand through it. The thinner the better.
- Cook. As you roll place each tortilla on the hot, dry skillet and cook undisturbed until toasted and bubbles cover the surface, about 1 minute. Flip and cook another minute on the other side. Keep warm in a clean towel and repeat with remaining dough.
Notes
- Make-ahead: If you don't want to cook them all at once, roll out all the dough and layer between pieces of parchment paper. Wrap in plastic wrap and store in the refrigerator for up to 3 days.
- Knead by hand: If you don't have a stand mixer and want to try mixing the dough by hand, follow the instructions in the post. Be prepared to work with a very sticky dough but have faith, it will come together.
Recommended Products
As an Amazon Associate and member of other affiliate programs, I earn from qualifying purchases.


Nutrition Information:
Yield: 30 Serving Size: 1Amount Per Serving: Calories: 95Total Fat: 5gSaturated Fat: 2gTrans Fat: 0gUnsaturated Fat: 3gCholesterol: 3mgSodium: 103mgCarbohydrates: 12gFiber: 2gSugar: 0gProtein: 2g
In support of this small business, ¡Hola! Jalapeño earns revenue in a few different ways. Several sponsored posts are published each month. I also earn an affiliate commission on the sales of products I link to— there are a few of those links in this post. I only feature items I genuinely love and personally use on a regular basis. This commission is an arrangement between the retailer and ¡Hola! Jalapeño (readers never pay more for products). This income allow me to run the site. Thank you for reading!


Those look delicious and beautiful.
Thank you so much!
We make these often ! Simple, delicious, Lite, and fluffy as far as flour tortillas goes.
Absolutely love hearing this! 🥰 So glad you enjoy the recipe and that it’s become a regular in your kitchen.
I love homemade tortillas. I used to make them often. I usually smoked out my kitchen with excess flour used from rolling. It has been years since I’ve made them. You’ve inspired me to try them again!
I hope you do get a chance to make them, Kathy! Let me know if they are as good as those beautiful bread sticks you made. 🙂
OMG Kate, you made me laugh with the acitron thing! I bet you already know where to get it because it’s already chiles en nogada season! And btw, I’m saving this on Pinterest. These tortillas look amazing! I’m loving your blog more and more…
Thank you Enri! I’m serious though, had no idea what those things were when I first read the book. 🙂
Hello, I am wondering if the directions in step 3 are saying to only add 1c water as opposed to 1 3/4c. Thanks for any clarity.
Hi Ash, Yes, thank you for pointing that out. I fixed the recipe. It is supposed to say 1 3/4 cups.
Can i cut the recipe in half? that’s too many to do at once.
Hi Grace! Absolutely, the recipe works exactly the same cut in half.
Used your tortilla recipe substituted lard etc with strained bacon grease. Loved em!
Oh, I bet those were so good!
I’m anxious to try your recipe on green mole, We will let u know how it turned out!
Yes Carmen, please let me know!
I use my tortilla press all the time making flour tortillas. I make sure to rest the dough 30 minutes and that my dough is nice and soft when I go to press them.
I tried this recipe, measured with a kitchen scale, and after 20 minutes of mixing I had a counter covered in paste. I even tried adding an extra 1/4 cup of flour, but it was still much too wet and sticky to ever come together.
This recipe doesn’t not work. Way to high hydration.
Hi James, I tried the recipe again because I wanted to make sure it works and even though the dough is stickier than most, it still made beautiful, stretchy tortillas. If you feel like giving it another go, try mixing it in a Kitchenaid mixer instead of by hand. I think you’ll be happy with the results.
I agree with James! I think the water measurement is too much!!my dough was a cake-like paste. I mixed it in a kitchenaid. A little frustrated because now I’m out of flour. I live in Europe, so stores aren’t open on Sundays.
Hi Ashley, thank you for trying this recipe. I don’t have much experience with types of flour sold in Europe, but it could be that it is a less glutenous blend than the standard all purpose flour in the US and therefore will need to add more.
I am transported back in time to my childhood, growing up with neighbors who made fresh tortillas daily. I make/mix mine by hand. It’s a leap of faith, but the ingredients come together easily!! Thank you for an amazing recipe!!
That’s so heartwarming to hear! It brings me joy to know this recipe rekindled such cherished memories. Thank you for sharing your experience and for the kind words. I’m so glad you enjoyed it, and I hope it becomes a new tradition in your home!
Yup, I use the same recipe, but I cook them on a very hot comal and only 15 seconds per side. When reheating I just put the tortilla on the gas stove grate for 5 -10 seconds per side. You are so right! They are much better than those things they call tortillas at the grocery store. 5 star recipe. Only hard part is learning how to roll them out round, LOL, I’m almost there after two years, LOL
Thanks for the 5-star review, I’m thrilled you enjoyed the recipe. And you’re absolutely right, homemade tortillas are so much better than store-bought ones.
So, I made these. However, I had to add about 1½ cups more flour and they were still too sticky to easily handle (I weighed the original 4 cups, 480 grams). I immediately added almost ½ cup of the extra flour while mixing the dough. They were super sticky when I made the balls. After 20 minutes I tried to cook one, but while pressing it was sticking to the parchment and I couldn’t get it off the parchment without scraping. I added a cup more flour and made balls again, rolling each one in flour before shaping. I let the rest a few more minutes.
I was able to form them into tortillas between two sheets of parchment sprayed with oil using my tortilla press. I had to peel the top sheet off and flip the tortilla into the pan before peeling off the bottom sheet.
They turned out soft and stretchy with good texture, probably due to mixing in the mixer.
I will not be using this recipe again.
Thank you so much for sharing your experience and detailed feedback. I’m sorry the dough was so sticky and tough to work with, even after adjusting the flour. Sometimes small differences in ingredients or environment can really affect the outcome. I appreciate you giving it a try and letting me know how it went—it’s super helpful for me and other readers. If you have any questions or want to troubleshoot in the future, I’m always here to help!