This dairy-free Concha recipe will take you step-by-step through how to make this soft and pillowy Mexican sweet bread at home. They taste exactly like the lightly sweetened bread roll with the crunchy topping you find at your local Mexican bakery—but dairy-free!
The last time Armando and I were in Mexico City we ate and we ate and we ate.
Our last stop before heading to the airport was to Maque Cafe, a sweet little breakfast spot where the servers weave through the tables on the tree-lined street with overflowing trays of pan dulce.
I’ve wanted to recreate the conchas we had there for the longest time. They had the most bouncy, springy crumb with a crunchy, delicate topping. Ideal for dipping into hot chocolate or atole.
I wanted to recreate all this but also make them dairy-free so Armando could enjoy them right along with me.
If you’re not concerned with making them dairy-free you can always swap the vegan butter/vegetable shortening with unsalted butter and the plant-based milk with whole milk.
Should we jump in?
what is a concha?

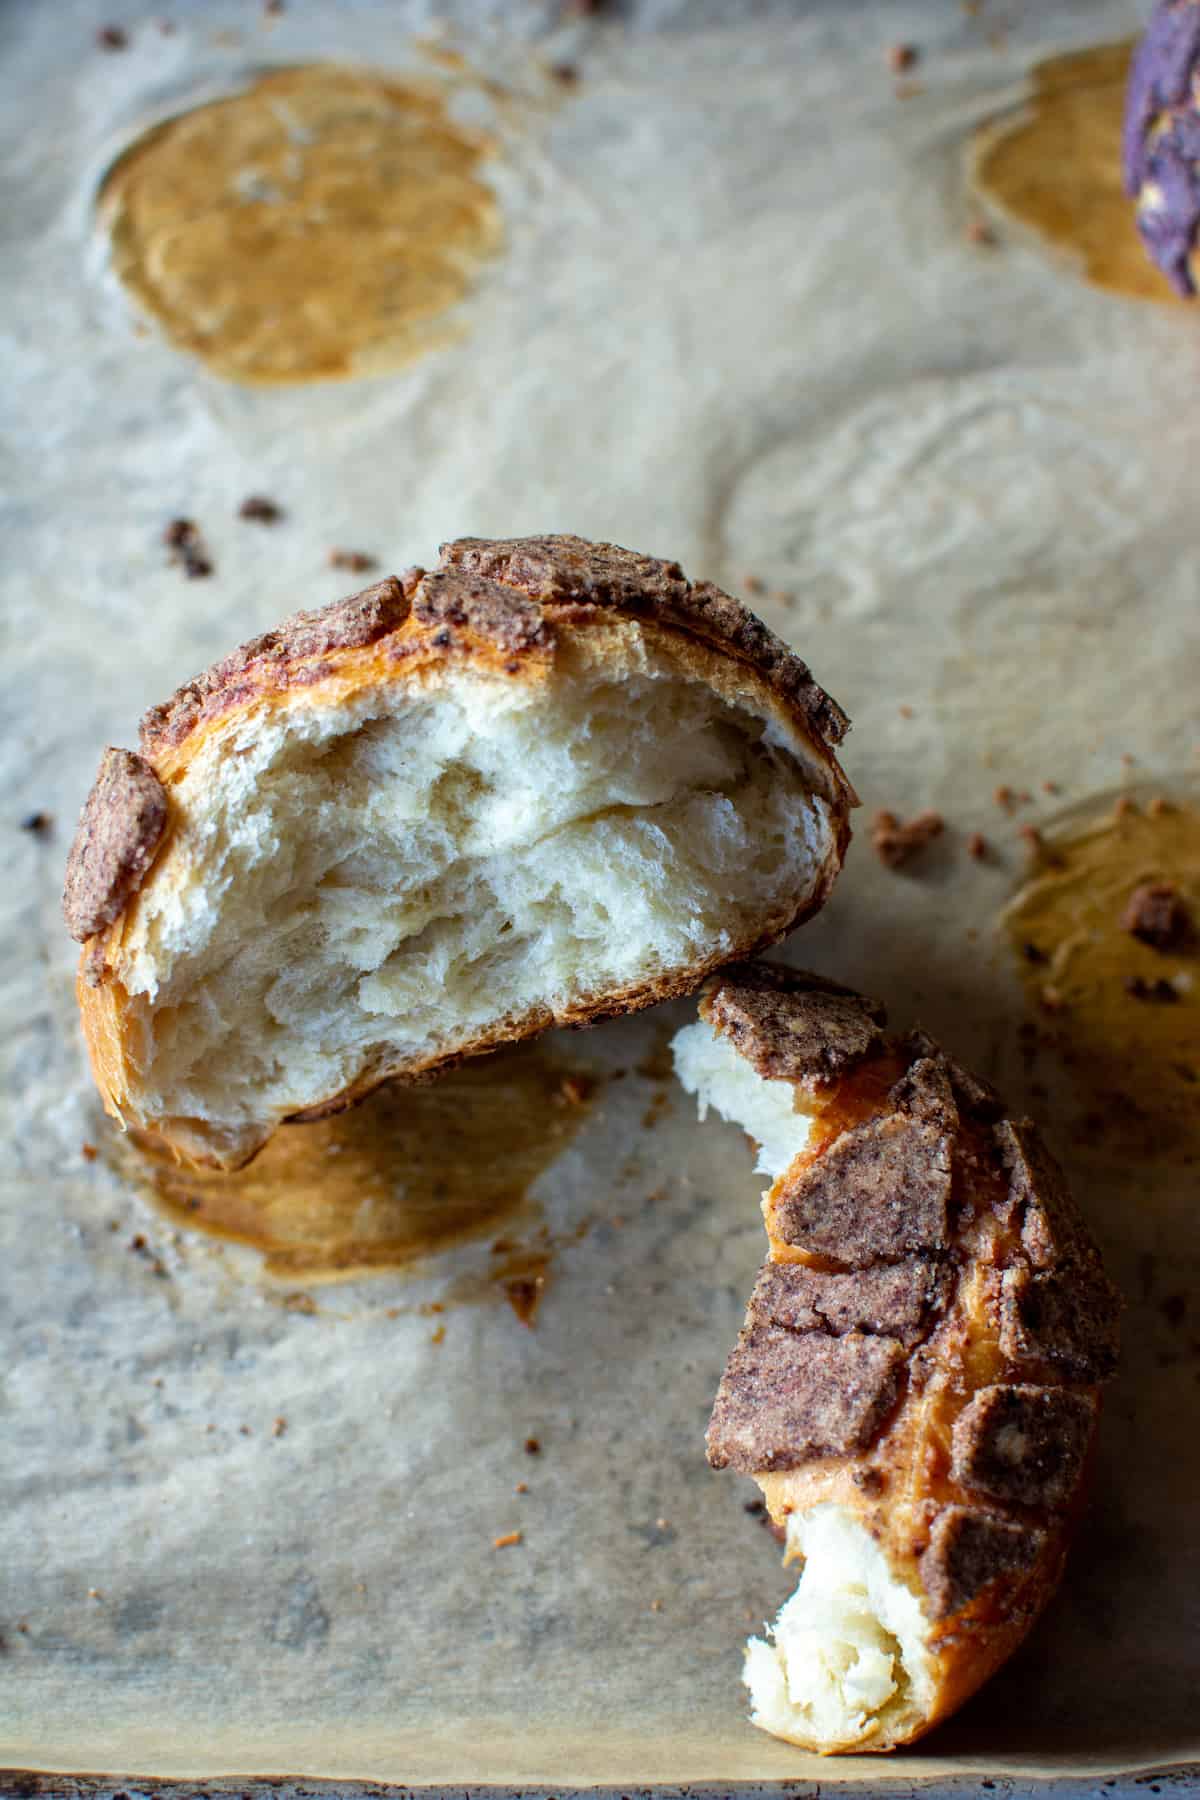
Mexican conchas are one type of pan dulce or sweet bread that are enjoyed for breakfast, dessert, or as a snack.
They start with a lightly sweetened, yeasted bread roll that is topped with a crumbly flavored topping.
The topping is almost like sugar cookie dough, just without any egg, and can be any number of flavors and colors.
The most traditional are white (vanilla) and brown (chocolate).
ingredients

The ingredients list for making conchas is pretty basic. I used freeze-dried fruits to make different flavored toppings but that is optional. Here’s what you’ll need:
- All Purpose Flour
- Plant-based milk (I used vanilla soy milk)
- Granulated Sugar
- Large eggs
- Active dry yeast (more on that below)
- Kosher salt
- Plant-based butter (my favorite brand is Miyoko’s) or vegetable shortening
- Vanilla extract
- Baking powder
- Freeze-dried fruit for the flavored topping (optional). I used freeze-dried raspberries, blueberries, and mango.
- Cocoa powder for chocolate topping
how to make the concha dough

Before you start this project, make sure to give yourself plenty of time.
The dough will need to rise for a few hours before forming into the rolls and a couple hours more before baking.
To get started, combine the dough ingredients (except the plant-based butter) in the bowl of a stand mixer fitted with the dough hook attachment.
Mix on low until combined, then increase the mixer speed to medium and slowly start adding the butter a little at a time, letting the first piece of butter mix completely into the dough before adding the next.
After the last piece of butter has been combined, let the dough continue kneading for 8 minutes.
Grease a large bowl. Transfer dough to the bowl, and cover with plastic wrap. Let the dough rise in a warm place until it doubles in size, about 4-5 hours.
how to make the topping

To make the topping, add all the ingredients (except the flavorings) to the stand mixer. And beat until combined.
A lot of conchas recipes use food coloring to make the different shades of toppings but I thought it would be fun and more delicious to use freeze-dried fruits.
You can completely skip this step and make all the topping vanilla flavored or make half vanilla and add cocoa powder to the other half to make them chocolate.
If you want to try using the freeze-dried fruit, grind 1/4 cup of the fruit in a clean coffee grinder or food processor until it is a very fine powder.
Knead this powder into 1/2 cup of the topping with your hands in a small bowl until well combined.
how to assemble and bake

Once the dough has doubled in size, now it’s time to form it into rolls.
The most accurate way to make rolls of even size is to weigh the dough (I use this handy scale) and then divide that number by 12. For me, I got about 38 ounces total, which meant rolls about 3 ounces each.
If you don’t have a scale you can eyeball it, but you want to end up with 12 rolls.
To form the rolls
I thought this method that Joy used to form her conchas was just brilliant. Here’s how she did it:

Take one piece of dough and pinch all the ends together at one end to create a firm, round ball with a nipple on one side.

Flip the ball nipple-side-down on the counter and gently roll the ball to flatten it. As Joy described it, “like you are playing air hockey”.

Place the rolls on two baking sheets giving them plenty of room in between. Beat the remaining egg and brush each roll with egg wash.
Now for the topping

The easiest way to get an even topping layer is to use a tortilla press.
If you don’t have one you can roll the topping with a rolling pin into a 1/4-inch thick circle.
Decorate the rolls

Gently form the topping around the top and edge of the roll.
You can buy a stencil to create the design on top or use a sharp pairing knife like I did to create the design.
Go with the traditional shell design or anything else you want to try—have fun with it! Cut through the topping, but not the roll. Repeat with remaining topping and rolls.
Cover with a kitchen towel and let rise another 2 hours.
Heat oven to 350°F. Place rolls in preheated oven and bake 25-30 minutes.
a word about using yeast

I have found that the longer, slower rise when making yeasted doughs results in a much more flavorful bread.
To achieve this, I don’t activate my dry yeast before mixing it with the flour and other ingredients.
Typically a yeasted dough recipe will have you warm the liquid to about 105°F and sprinkle the yeast on top which wakes the yeast up and gets it to start doing its work of releasing carbon dioxide. In other words, activating it.
I skip this step and simply combine all the ingredients together. I still warm the milk—this will assist in getting things going— but don’t have it sit with the yeast just mix it in with the other ingredients.
The result is a very slow rise, giving the dough lots of time to ferment and become more complex and flavorful.
If you are in a hurry however, you can warm the milk, sprinkle the yeast on top. Let it sit 5-10 minutes or until it becomes creamy and bubbly. Then proceed with the recipe. This should cut the rise time in half.
more mexican breakfast recipes to try!
- Jugo Verde {Mexican Green Juice}
- Authentic Mexican Chilaquiles with Scrambled Eggs
- Masa Harina Pancakes with Strawberries
- Churro Bacon Waffles
- Sweet Potato and Chorizo Quiche
- Tres Leches French Toast Casserole
- Green Chilaquiles with Fried Eggs
don’t be self-conchas
Making conchas is fun! I hope this step-by-step recipe has given you the confidence to give it a try. When you do, don’t forget to snap a pic and tag me on Instagram @holajalapeno and #holajalapeno so I can see or leave me a comment below (don’t forget to leave a ⭐️⭐️⭐️⭐️⭐️ rating) ! Also, make sure to sign up for my weekly newsletter, lots of good stuff there too!

Dairy-Free Concha Recipe {Mexican Pan Dulce}
This dairy-free Concha recipe will take you step-by-step through how to make this soft and pillowy Mexican sweet bread at home. They taste exactly like the lightly sweetened bread roll with the crunchy topping you find at your local Mexican bakery—but dairy-free!
Ingredients
For the dough:
- 4 1/4 cups all purpose flour
- 1 cup warm (about 105°F) plant-based milk, I use vanilla soy milk
- 1/2 cup granulated sugar
- 3 large eggs, room temperature (divided)
- 1 (7-gram) packet active dry yeast (or 2 1/4 teaspoons)
- 2 teaspoons vanilla extract
- 1 1/4 teaspoons kosher salt
- 1 stick (8 tablespoons) room temperature plant-based butter (I like Miyoko's brand), cut into small pieces
For the topping:
- 1 1/4 cups all purpose flour
- 1 stick (8 tablespoons) plant-based butter, room temperature
- 3/4 cup granulated sugar
- 2 tablespoons plant-based milk
- 2 teaspoons vanilla extract
- 1/2 teaspoon baking powder
Mix ins (optional):
- 2 tablespoons cocoa powder
- 1/4 cup (or more depending on how many flavors you want to do) freeze-dried fruit such as freeze-dried raspberries, blueberries, and/or mango
Instructions
- Mix the dough. Combine flour, milk, sugar, 2 of the eggs, the yeast, vanilla extract, and salt in the bowl of a stand mixer fitted with the dough hook attachment. Mix on low until the ingredients are combined.
- Add the butter. With the machine running, begin adding the butter a piece at a time, letting the first piece mix in before adding the next.
- Knead. Once all the butter has been added, increase the speed to medium and knead the dough for 8 minutes.
- The first rise. Grease a large bowl, add the dough and turn in the bowl to cover in oil. Cover bowl with plastic wrap and let rise in a warm place until doubled in size, about 4-5 hours.
- Make the topping. Combine flour, butter, sugar, milk, vanilla, and baking powder in the bowl of a stand mixer fitted with the paddle attachment. Mix until combined.
- Add flavorings. If you want to add cocoa powder, mix 2 tablespoons of cocoa powder to 1/2 cup of the topping. Knead the cocoa powder in with your hands in a separate bowl until well combined.
- To use freeze-dried fruit: Grind 1/4 cup of freeze-dried fruit in a clean coffee grinder or food processor until it is in a fine powder. Measure 1/2 cup of the topping into a separate bowl and add fruit powder. Knead into the topping until it is well combined. You can make as many flavors as you'd like. I was able to make 3 fruit flavors, chocolate, and vanilla with this amount of topping.
- Divide the dough. Once the dough has doubled in size, place dough on the counter and divide into 12 equal-sized pieces. The easiest way to do this is to weigh the dough on a kitchen scale, divide that number by 12, and then weigh out the pieces accordingly.
- Form the rolls. Taking one piece of dough and pinch all the ends together at one end to create a firm, round ball with a nipple on one side. Flip the ball nipple-side down on the counter and gently roll the ball to flatten it. Repeat with remaining dough pieces.
- Place on baking sheets. Line two baking sheets with parchment paper. Place the rolls (6 on each baking sheet) with plenty of space in between. Beat the remaining egg and brush each roll with egg wash.
- Press the topping. The easiest way to get an even topping layer is to use a tortilla press. If you don't have one you can roll the topping with a rolling pin into a 1/4-inch thick circle. If you do have a tortilla press, scoop 2 tablespoons of the topping and press into a ball. The topping should be dry but still hold together. If it is completely falling apart on you, add 1/2 teaspoon of milk and try again. Place the topping ball between two sheets of plastic on a tortilla press and press into a 1/4-inch thick circle. Remove plastic and place evenly on a roll.
- Decorate the rolls. Gently form the topping around the top and edge of the roll. You can buy a stencil to create the design on top or use a sharp pairing knife like I did to create the design. Go with the traditional shell design or anything else you want to try—have fun with it! Cut through the topping, but not the roll. Repeat with remaining topping and rolls.
- Second rise. Cover the rolls with kitchen towels and let rise in a warm place until almost doubled in size, about 1-2 hours.
- Heat oven. Heat oven to 350°F and arrange the racks in the upper and lower third of the oven.
- Bake. Once conchas are risen, remove kitchen towels and place in the oven on the arranged racks. Bake for 20-30 minutes, switching the pans halfway through. Conchas are ready when they are golden and firm to the touch and sound hollow when you tap on the bottom.
Notes
If you'd like to make the dough ahead, make the recipe up to the first rise. Refrigerate and continue with the recipe the next day.
Nutrition Information:
Yield: 12 Serving Size: 1Amount Per Serving: Calories: 138Total Fat: 3gSaturated Fat: 2gTrans Fat: 0gUnsaturated Fat: 1gCholesterol: 7mgSodium: 28mgCarbohydrates: 26gFiber: 2gSugar: 14gProtein: 2g
In support of this small business, ¡Hola! Jalapeño earns revenue in a few different ways. Several sponsored posts are published each month. I also earn an affiliate commission on the sales of products I link to— there are a few of those links in this post. I only feature items I genuinely love and personally use on a regular basis. This commission is an arrangement between the retailer and ¡Hola! Jalapeño (readers never pay more for products). This income allows me to run the site. Thank you for reading!


